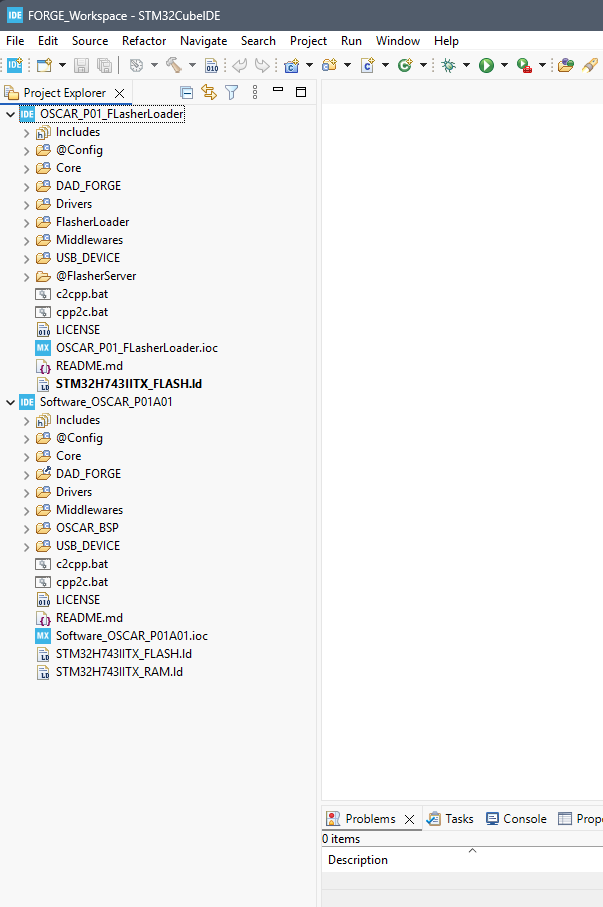
How to Create Your Workspace
This tutorial explains how to clone and set up the necessary repositories for developing audio effects within the OSCAR Workshop environment.
Note
Once you are familiar with the OSCAR Workshop environment and its development tools, you can certainly organize your workspace and repositories differently. The method described here is simply a recommended starting point.
Prerequisites
Before starting, ensure that the following tools are installed on your computer:
- Git
- STMicroelectronics STM32CubeIDE
Creating the Workspace Directory
Create a working directory for STM32CubeIDE projects, for example, named FORGE_Workspace.
Run the following commands:
mkdir FORGE_Workspace
cd FORGE_Workspace
Clone the Project
We will retrieve the repository containing the source files and configurations required by STM32CubeIDE to build the executable for your effect.
For the OSCAR hardware target, use the following command:
git clone --recurse-submodules https://github.com/DADDesign-Projects/Software_OSCAR_P01A01
For the PENDA hardware target, use the following command:
git clone --recurse-submodules https://github.com/DADDesign-Projects/PENDA-Software
The repository is now available in your workspace:
OSCAR:
FORGE_Workspace
   |___PENDA-Software
PENDA:
FORGE_Workspace
   |___PENDA-Software
Cloning Flasher Loader
Next, clone the flasher/bootloader project:
OSCAR:
git clone --recurse-submodules https://github.com/DADDesign-Projects/OSCAR_P01_FLasherLoader
PENDA:
git clone --recurse-submodules https://github.com/DADDesign-Projects/PENDA_FLasherLoader
This project includes:
- The flasher utility, used to transfer resource files (images, fonts, ELF executables, samples, etc.) into the external QSPI flash memory of the OSCAR or PENDA board.
- The bootloader, which is used by the pedal to launch the selected executable from the external QSPI flash memory upon power-up.
Opening the Workspace in STM32CubeIDE
- Launch STM32CubeIDE.
- If the IDE opens directly without prompting you to select your workspace directory,
click Other… in theFile/Switch Workspacemenu.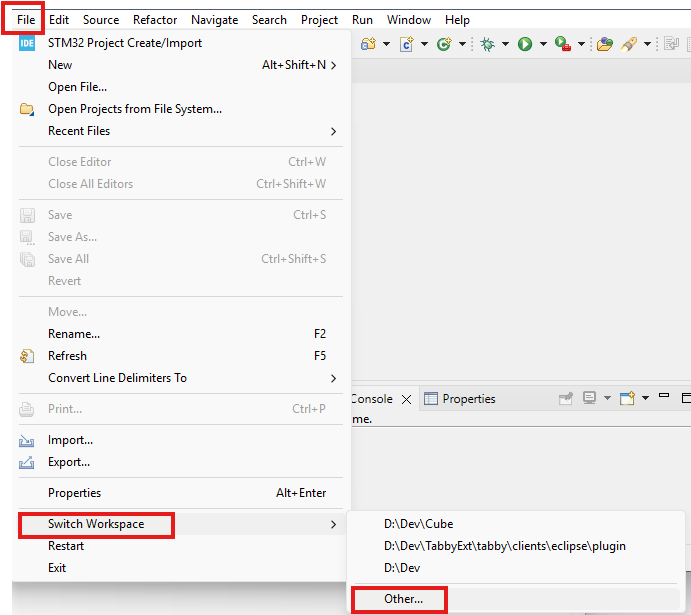
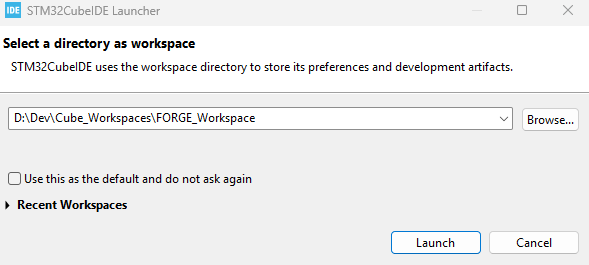
Whether opening directly or after clicking on the
File/Switch Workspacemenu, a dialog box will appear asking for your desired workspace location:- Click on Browse.
- Select the directory you just created (
FORGE_Workspacein this tutorial).
- If the IDE opens directly without prompting you to select your workspace directory,
Importing the Projects into the STM32CubeIDE Workspace
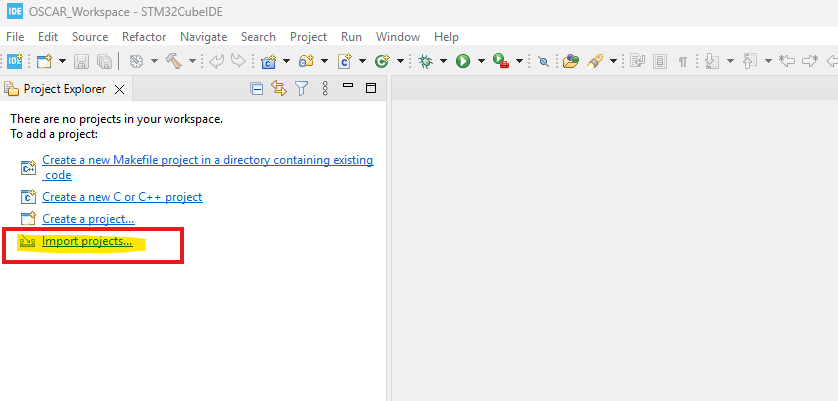
1. In the Project Explorer, click on Import Projects.
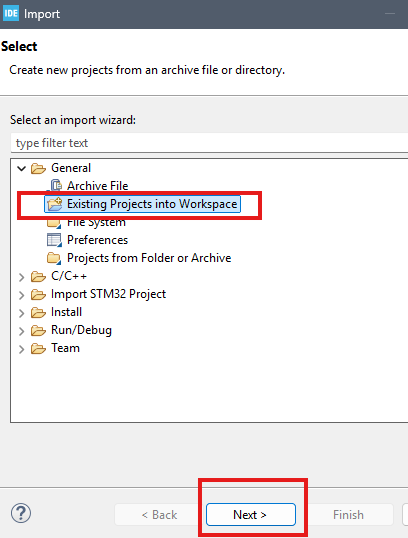
2. In the Import dialog box:
- Select General /Existing Projects into Workspace.
- Then, click the Next button.
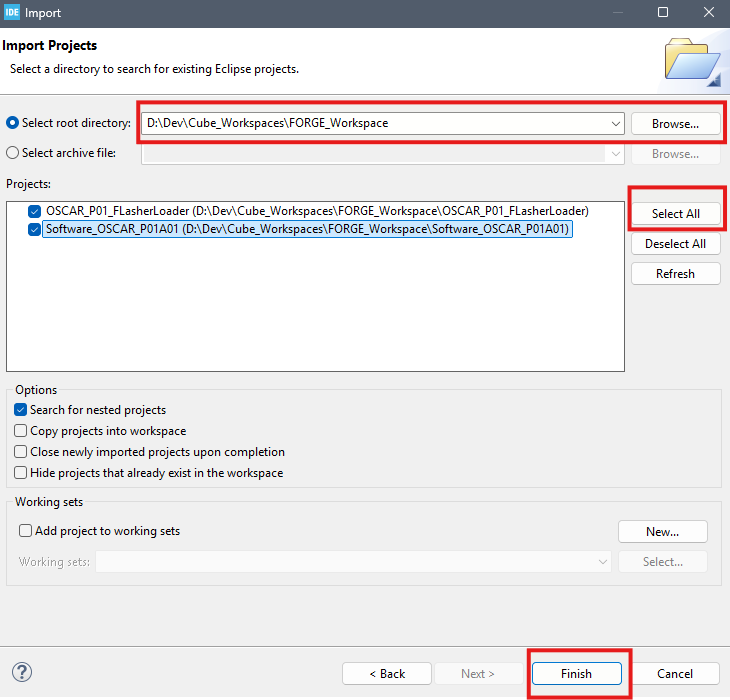
3. In the Import dialog box, select the root directory:
- Click on Browse 🔍.
- Select your workspace directory (
FORGE_Workspacein this example). - Click on Select All ✅.
- Finally, click the Finish button.
✅ Your Workspace is now configured
You are ready to start working with FORGE projects.
👉 See the next tutorial to compile your first effect